Wednesday, October 23, 2013

Bathroom Tile Day 3 and More

Wednesday was busy at 3283. Johnathan was here by 8:30 to continue the tile work. His first task was to slightly build up the height of the bench in the shower. When I framed it in I failed to account for the thickness of the cement in the shower pan. It was thus about 2 inches shorter than planned. But the professional made it right. Thanx, Johnathan.

He worked on the tile in the shower area all day. There was a lot of cutting, beginning with cutting full tiles into thirds to create the accent strips we planned. Then each end tile on each row on each of the three walls needed to be cut. And finally all the top row of tiles needed to be shortened.

Below are some photos of him at work throughout the day.

Cutting tiles to width on the wet cut tile saw.
The accent row even with the top of the knee wall was set first.
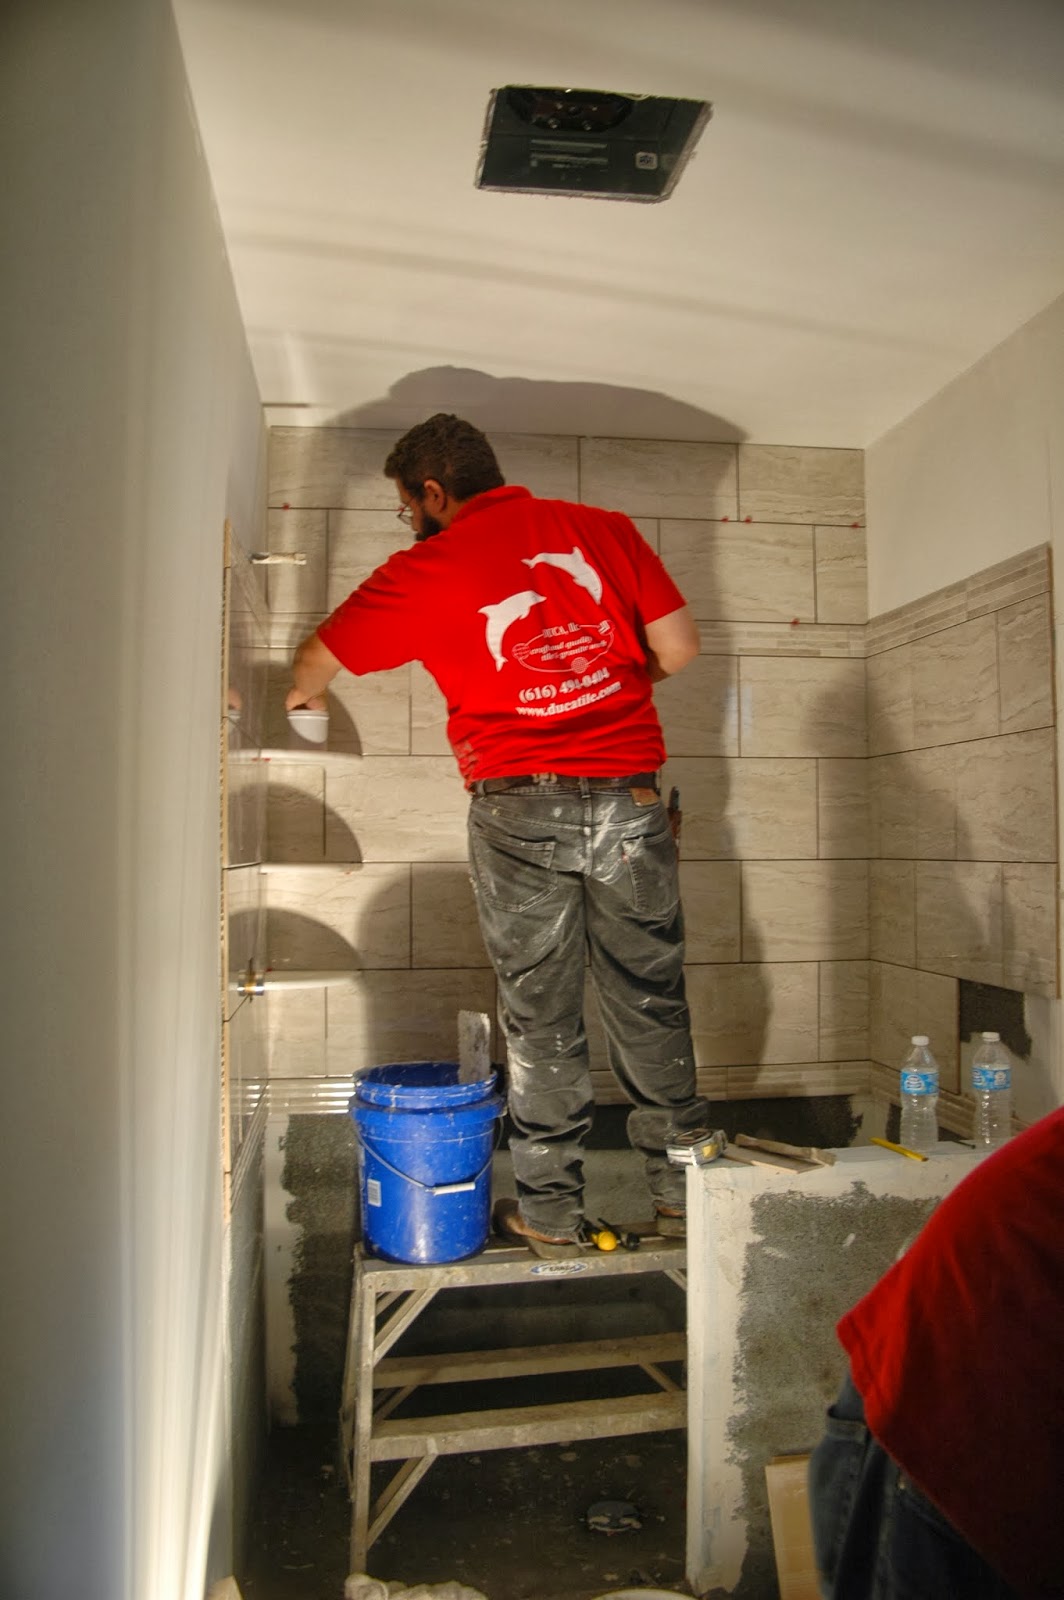
Then Johnathan worked up toward the ceiling.
Tiles were placed on three walls up to the level of the second accent row.
You can see the notches in the tile where shelves would be put.
In this picture, tile is all the way to the ceiling on the north wall
and the three shelves are in place.
Two other Duca staff members showed up in the afternoon to install the granite counter top. They actually arrived just as the plumbing supply company was delivering the faucets, shower controls and toilet. Timing worked perfectly so the crew knew just how to drill the holes for the fixtures.

The granite was set onto the cabinets.
A little fitting needed to be done to make it slide into place.
Counter top is set...waiting for sink to be installed.
Sink can be seen in cabinet below.
Again, some "field adjustments" were required to the sink lip.
This allowed it to fit tight with the inside of the cabinet.
Four holes were drilled in the granite to allow the faucet,
two handles and a soap dispenser to be installed,
The vacuum kept dust almost non-existent.
Also this afternoon, Fred from B&F Masonry came by 3283. Since the block foundation was built back in spring a few cracks have appeared in the joints. He was here today to cut out the impacted areas and replace the mortar. We also have a couple other sections of the wall that may need attention after winter. We'll watch them for the next few months....and see if more work is needed next year.

The most noticeable crack was along the top row of block on the west wall.
Fred removed the old mortar and replaced it.
Fred left 3283; the granite crew left 3283 and Johnathan finished up Day 3 of the tile job late in the afternoon. He will be back in the morning to finish the wall tile and start the floor tile. He expects that final grouting will be on Friday. Then I need the plumber here and the glass company to come measure for the shower wall/door and mirror. 

At day's end the bathroom was really beginning to take shape. 
Pictures are below.


Tuesday, October 22, 2013

Bathroom Tile Work Day 2

The new bathroom at 3283 is moving closer to completion. The Duca Tile team spent much of the day here building the shower pan, finishing the cement board, and laying out the floor tile. But before they could start we needed a visit from Ben Jones of Tolsma Plumbing. When the bathroom plumbing was roughed in only a pipe stub had been left in the floor of the shower. Before the shower pan could be 'poured' the drain needed to be installed. 

Ben pulled out the temporary stub and enlarged the hole for the new drain fitting.
The new fitting has been fit into the floor opening.
Ben is cutting the pipe to connect it to the drain pipe.
Johnathan's first task today was to tape and mud
the joints in cement board on the shower wall.
A large tub was set up in the bedroom in which
the cement for the shower pan was mixed.
The cement was poured onto the shower floor
to create the slope toward the drain.
The cement [which was mixed very dry] was troweled and pounded
into place. Johnathan spent a lot of time getting it just right.
Next, A heavy vinyl shower pan liner was installed.
It was carefully cut and fitted into the drain fitting.
And,it was extended about 4-6 inches up each wall.
Next the lower cement boards were installed on the wall,
a second level of cement was placed on the floor [over the liner],
a curb was built in the door opening, and remaining joints were taped and sealed
.
By mid afternoon, the shower area was prepared for tile.
The cement will set over night.
Since there was time left in the day, Johnathan moved the wet-cut tile saw into the bedroom and began to lay out the tile for the main bathroom floor. He cut and dry-fit all the tile except those that will abut the entry curb to the shower. These can't be measured until the temporary "forms" that are shaping the curb are removed -- tomorrow.

The first piece of tile to be cut was the threshold under the bathroom door.
Random lengths of tile started each row at the south wall of the bathroom.
Complex cuts were needed to fit around the end of the knee-wall
and around the toilet fittings.

When the tiles were temporarily laid in place it gave a nice idea of how they will eventually look. Its hard to tell from the photo, but the pattern on these tiles makes them look like cork strips.


Next Bathroom Steps

Work at 3283 over the past few days centered on the new bathroom. The walls and ceiling were primed last week. Then I painted the ceiling with a satin sheen 'ceramic' paint. Again, white paint over white primer doesn't photograph well; so no pictures.

The bathroom cabinets were also delivered last week, so a few hours was spent installing them. They needed to be in place before the tile work could begin. I didn't get pictures of the installation process. But, it consisted of playing with shims to make sure they were level and plumb and screwing them to the wall. Not the most exciting work. But the results were fulfilling. Though its hard to take pictures in the small bathroom I've included a couple below to give the idea. Bobbie needs to decide on hardware [handles].


Yesterday [Monday] Johnathan from Duca Granite and Tile began the process of tiling the bathroom. They will be installing tile throughout walls of the shower area,  the shower floor and the entire bathroom floor. They will also be installing granite for the counter top, the caps of the knee walls and the seat of the bench in the shower. Day one was the installation of most of the cement board in the shower area and on the bathroom floor.

Johnathan is nailing a piece of cement board on the west shower wall.
The top cement boards are in place in the shower.
Looking north in the bathroom.
The lower cement boards will be put in after the shower pan is poured.
Tuesday morning the plumber will be here to adjust the shower drain and Johnathan will be back to pour the shower floor and finish the cement board. I'll post again later today or tomorrow morning.

Tuesday, October 15, 2013

Drywall Dust -- Then Paint

The drywall work ended on Saturday. Well, the contractor completed hanging and finishing the wallboard before noon on Saturday. His work that morning consisted of final sanding all the joints. We knew the drywall portion of the project would be messy. But I didn't expect this much dust to travel throughout the house. I shut off the furnace before Jason began his work...and covered the heat registers so dust wouldn't be circulated throughout the house by fan [or find its way into the furnace and air conditioning coils].

Although he made dust, Jason did a wonderful job on the drywall. Below are a few pictures of the final sanding he did on Saturday.


We spent Saturday afternoon with brooms, the shop vac and damp mops....and I think we got 80% of the dust removed. But I expect that removing all of the remaining 20% will be a slow and frustrating effort....probably taking weeks.

Bobbie used the shop-vac to clean dust from the window edges.
By early Sunday we had most of the dust under control. At lest enough of it was removed that we could start painting [priming] the wallboard. We spent the afternoon with brushed and a little-bitty roller working our way around all the corners, outlets, windows with primer. With that done, Bobbie headed back to Livonia and left me to prime the rest of the walls.

Yesterday [Monday] was a long day. I bought special primer for new drywall from a local company [RepcoLite]. Its formulated to prevent the "fuzzing" that often occurs when you paint the scuffed paper surface of new wallboard. It worked wonderfully. But, like any primer, it soaked into the wallboard quickly. My calculations show that I covered about 1120 square feet of surface [walls and ceilings]. I used all but a little of FIVE GALLONS of paint. So coverage was about 225 sq ft per gallon. Not too bad, I guess.

I do know that I've never gone through 5 gallons of paint in one day before in my life....and hope to never do it again. But the rooms are primed and ready for paint. Some of that may start yet today.

Many of you know that much of the empty space inside my head is filled with lyrics from old rock songs. As I worked the roller over the ceiling and walls of these rooms I couldn't get Cream out of my head. Though I did modify the words slightly to better fit 3283:

" In a White Room ... with no curtains ... near the lake shore.."

Which of you olde Clapton fans know what "no" and "lake shore" should be replaced with? [Answer with a comment, please.]

 Pictures below:
Bedroom looking westerly.
Bedroom looking easterly.
Living room wall.
Bathroom looking south.
Laundry area.


Thursday, October 10, 2013

Drywall Finishing Begins


[ Yes, this is the second posting today. I've been posting about the previous day's events in the morning for the past couple days. Today the work ended early so I'm catching up. The earlier post was about yesterday's (Wednesday's) work. This is about the work done today (Thursday).]

Drywall finishing is an art. It takes someone with certain specific talents to properly apply tape to the joints, spread layers of joint compound flawlessly over the joints and trowel/sand the surface smooth. Finishing of the drywall at 3283 began today. Jason Austin spent most of the day turning the individual sheets of drywall into full uninterrupted walls. He was quick; he was meticulous; he was ....professional. This is one task I'll never attempt myself.

He worked from about 9:30 this morning until 4:30 or so this afternoon. As he left he placed fans in each room to help the mud dry. And if the critical corner joints do dry by morning he will sand and apply the final mud coat tomorrow. Then, on Saturday there will be the final sanding....and the walls will be "paint ready."

Paper tape was used along the corners where walls meet the ceiling and where two walls meet.
Taping and applying joint compound in the bathroom was done early in the day.
Flat joints were finished with plastic mesh tape and the joint compound.
When you realize the amount of work each joint requires
you understand why professionals minimize the number of joints.
I posted pictures of the bedroom this morning before the finishing began. Compare those with the following pictures of the room with today's effort to finish the joints.  Jason has fans and heaters going in each room to help dry the material in preparation for tomorrow's work. 


Here are a couple photos of the bathroom with joints finished.
It will soon be ready for cabinets and tile.

The tile contractor will install cement board in the shower area  below the drywall.
However the shower will be tiled up to the ceiling.